This post may contain affiliate links. As an Amazon Associate we earn from qualifying purchases.
You’ve found your guide to impatiens care! Do impatiens need sun or shade? How do you care for potted impatiens? Do you have to deadhead impatiens? How do you keep impatiens blooming? Read on to the answers to those questions and more!
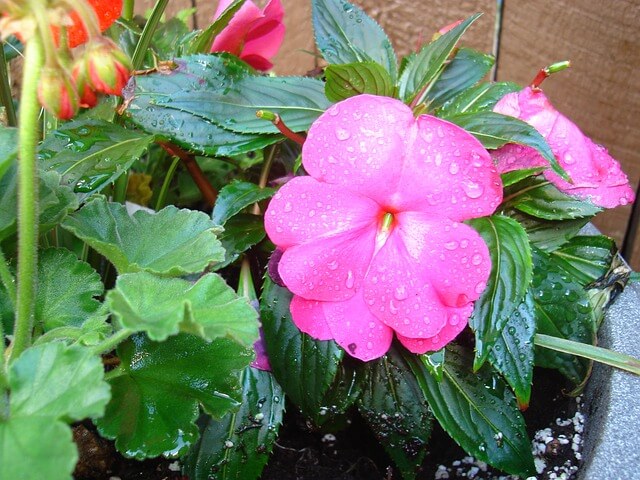
Spring is the time of year when impatiens (Impatiens walleriana) become the star of the garden. An annual flowering plant, native to Africa, it is the most widely grown bedding plant in the U.S., according to horticulturists with the Iowa State University Extension.
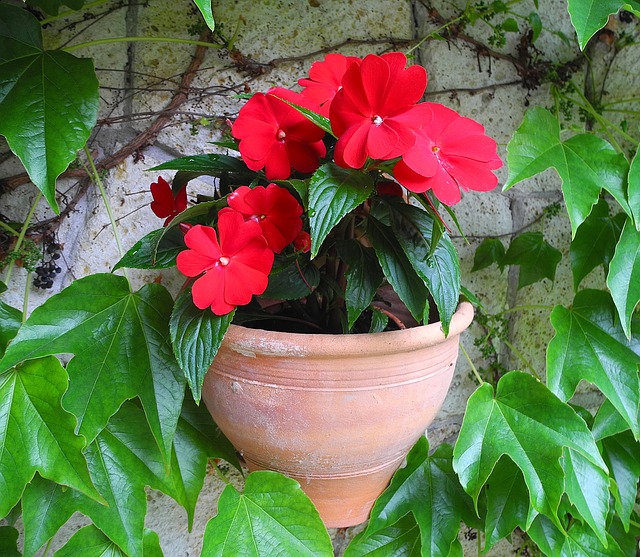
And, for good reason. Impatiens is easy to grow, brighten up shady garden corners and easily adapt to being grown in beds, pots or hanging baskets.
Today we dive into all things impatiens, from choosing to planting, feeding, pruning and propagation.
How to choose the perfect impatiens
When shopping for impatiens to plant in the spring, keep in mind that some varieties prefer sun and others thrive in the shade. Check the plant label carefully to ensure you’re purchasing the right plant for the right spot in your garden.
Some species and varieties are naturally bushier than others. If a fuller plant is important to you, consider planting the Infinity New Guinea impatiens (Impatiens hawkeri) or ask the specialist at the nursery for suggestions.
New Guinea impatiens, by the way, tolerate more sun than I. walleriana as well, so keep that in mind as you shop for impatiens. You may see the hybrids SunPatiens and Big Bounce™ impatiens (among others) at the gardening center.
How and when to plant impatiens
Do impatiens need sun or shade? Either, but it depends on the cultivar.
Impatiens is many a gardeners’ dream-plant for filling in those shady nooks and crannies in the garden. When it’s time to plant yours, determine if it’s a shade lover or one of the varieties that tolerate a bit of sun and then choose your planting spot.
A general rule of thumb is to plant them in an area that receives dappled sunlight. They should go into the ground after all danger of frost has passed.
Harden off your new impatiens plants by placing them in a shady area, outdoors, when you bring them home from the nursery.
Increase the amount of indirect sunlight they receive every day for five days. This process gets the plants used to being outdoors instead of a protected greenhouse or nursery.
Pour 3 inches of compost onto the soil and use a gardening fork to mix it to a depth of 6 inches. Use a rake to level and smooth the area.
Use a gardening trowel to dig planting holes that are the same depth and three times the diameter of the nursery pot in which the impatiens is growing. Place the roots of each plant into the holes and pack soil around them.
Impatiens have a tendency to take up water from the soil rather quickly. To keep more moisture in the soil, apply a layer of mulch surrounding (but not touching) the impatiens.
Water the newly-planted impatiens to a depth of 4 inches and water once a week unless it rains. If the weather is particularly hot you may need to water twice a week.
Impatiens care
Water the impatiens until the top 4 inches of soil is moist and water weekly if there is no rain. Be careful not to overwater the plants.
Stick your finger into the soil to determine when it is time to water. If the top inch of soil is dry, water the impatiens.
If you are growing the impatiens in containers the soil will dry faster, so check periodically and water when the top of the soil is dry to the touch.
Impatiens typically do fine without fertilizer. If you feel the need, fertilize the impatiens with an all-purpose fertilizer, such as 6-2-4 in the spring, according to the rate suggested on the fertilizer package. Sprinkle the granules onto the surface of the soil. See the Resources section for where to buy.
Tip: Always apply fertilizer to wet soil and water after applying fertilizer.
Two weeks after the impatiens are established in the garden, cut them to one-third their size. This will encourage the plants to grow bushier and to provide more flowers.
Another way to encourage branching is to pinch the tips off new shoots periodically throughout the growing season.
Growing impatiens from seed
The rule of thumb is to start impatiens seeds eight to 10 weeks before the last frost date in your region. The soil in which you hope to germinate the seeds will determine whether or not you’re successful.
Shop for a sterile seed-starting mix (you’ll find an example of a suitable mix in the Resources section at the end of this post). Seed starting mixes are available online, at nurseries and at large home improvement stores.
Or, create your own mix by combining one part of peat moss with three parts of perlite.
Pour the mix into a gardening flat (see Resources) and pour water over it until it’s uniformly wet. Allow it to drain completely.
Then, scatter the seeds across the surface. Sprinkle a very thin layer — no more than 1/8 inch — of sand or perlite over the top of the seeds.
Impatiens seeds require light to germinate so if you cover the seeds too deeply, they may not sprout.
Keep the soil moist and the germination container on a seedling heat mat that remains between 70 and 75 degrees, Fahrenheit.
If given the proper care, your impatiens seeds will germinate within 18 to 28 days.
Transplanting the seedlings
After the last frost begin hardening off the impatiens seedlings (see How and When to Plant, above). Hardening off tiny seedlings is a bit more involved than hardening off nursery plants.
For the first three days, place the seedlings in an area that is protected from wind and direct sun. Bring them back indoors after three hours.
After the initial three days, begin lengthening the time the seedlings remain outdoors for 10 days. By then they should be able to withstand transplantation into the garden.
The seedlings will need light, fluffy soil, so til the area to a depth of 10 inches and add 2 inches of compost and 2 inches of sand to the planting area, mixing it thoroughly with the existing soil.
This mixture will provide the nutrients and quick drainage required to get the impatiens seedlings off to a good start.
When planting, space them at least 12 inches apart, on center (we offer a definition of “on center” here). Ensure the soil remains moist at all times.
How to propagate impatiens from cuttings
Impatiens are easy to propagate by cuttings taken in late summer.
- Water the impatiens the day before taking the cutting.
- Prepare a planting container by filling it with equal parts of sterile potting soil and perlite. Moisten the mixture well and poke holes in the soil for the cuttings.
- Use disinfected pruning snips to cut 4 to 6 inches from the tip of an impatiens stem. Take the cutting 1/2 inch below a node.
- Pinch off the leaves from the lower two-thirds of the cutting.
- Pour a small amount of rooting hormone into a small dish and dip the cut-end of the stem into it until the bottom inch of it is wet. Stick the stem into the hole in the potting soil, to within 1/2 inch of the bottom leaves.
- Place craft sticks or straws into the pot, along the inside rim, equally spaced. These will be used to hold the plastic bag away from the cutting.
- Slide the planting pot into a plastic bag, making sure that the bag does not touch the cutting. Secure the bag with a twist tie or other material.
- Place the potted cutting in indirect sunlight or 6 inches beneath grow lights. The impatiens cuttings should root within 6 weeks.
Resources
Michigan Peat Garden Magic Compost and Manure
Natural Cedar Mulch
6-2-4 Fertilizer
Hoffman Seed Starting and Planting Mix
Seed Starting Tray (extra strength)
VivoSun Seedling Heat Mat
Fiskars Pruning Snips
Dip ‘N Grow Liquid Rooting Hormone
Mention of a fertilizer or pesticide, or use of a pesticide or fertilizer label, is for educational purposes only. Always follow the product’s label directions attached to the container you are using. Be sure that the plant you wish to treat is listed on the label of the pesticide you intend to use. And observe the number of days between pesticide application and when you can harvest your crop.