This post may contain affiliate links. As an Amazon Associate we earn from qualifying purchases.
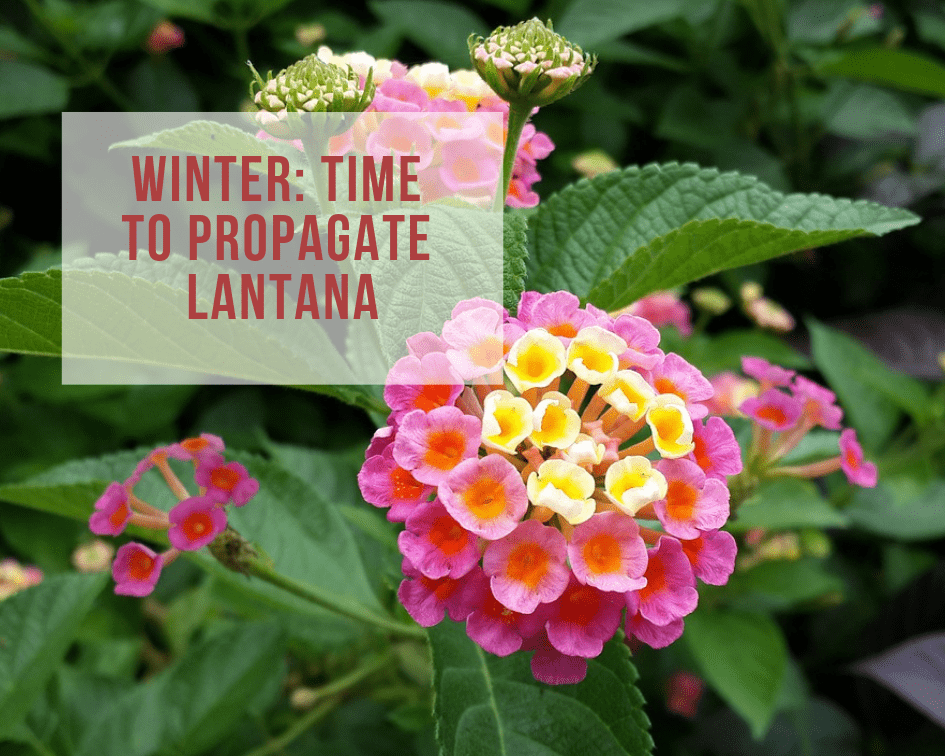
Propagate lantana cuttings — it’s a lot easier than you may think.
Wow. I’ve just finished reading several online articles about how to propagate lantana cuttings and they are almost all identical.
Let’s debunk what you’ll read on some of the other gardening websites:
“Take cuttings of new growth in spring.” Nope.
“Use rooting hormone …” Again, nopers.
“Stick the cutting in seed starting mix.” uh-uh.
Yes, you may be successful rooting your tender, 4-inch cutting in seed starting mix, but our way is much more successful and you’ll have a cutting with strong, healthy roots when it’s all said and done.
Oh – and rooting hormone is not required to propagate lantana.
What you need to root a lantana cutting
- Sharp pruning shears or garden snips
- Planting pot
- Coarse sand (silica sand #12 or any size up to #18)
Preparing the lantana propagation container
Use any container you like to propagate the lantana cutting. Keep in mind, however, that aside from drainage holes, it should be able to accommodate 8-inch (or longer) cuttings
The most challenging part of the lantana propagation process is finding the right sand. Your best bet is to buy it from a gravel yard in your area (Google “gravel” followed by the name of your town or city.)
This is how we get ours. But not all towns have a gravel yard and the big box department stores (at least when I shopped there) didn’t sell the appropriate size sand.
Another option is to go online and buy this one at Amazon.com. Pricier than what you’d pay at a gravel yard, this will definitely work. If all else fails, use peat moss, but be aware that fungus gnats love peat moss. If it becomes a problem, use Mosquito Bits. While it takes repeated applications, it’s the only thing we’ve found that works.
Moisten the sand before pouring it into the container or you may end up losing a lot of it through the drainage holes. Pack the moist sand into the container.
Taking the cutting to propagate lantana
For those new to plant propagation, it’s important to know when to take a cutting. You’ll have greater success, depending on the plant, when the cutting is taken at the right time.
There are four main types of plant cuttings: Softwood, hardwood and semi-hardwood. Yes, there are other types of plant cuttings, but these are the three most commonly utilized.
Softwood cuttings are taken from young stem tips that often have foliage. These are cuttings you’ll take early in the growing season. Softwood cuttings are ideal for perennials, some trees and deciduous shrubs. Examples of plants that do best with softwood propagation are verbena, fuchsia, petunia, magnolia and hydrangea (with the exception of climbing hydrangea).
Hardwood cuttings, on the other hand, are typically taken when a plant is dormant (after the leaves have dropped) and from woody stems. The best cuttings are those that have turned greyish brown near the base. This happens in late fall and early winter.
Hardwood cuttings are easier to propagate than softwood cuttings. Examples of plants from which to take hardwood cuttings include lantana, red-tip photinia and Hibiscus syriacus, aka Rose-of-Sharon).
Semi-hardwood cuttings are generally used for broadleaf evergreens. This includes euonymus, rhododendron, camellia, osmanthus and holly, among others.
The time to take semi-hardwood cuttings is when “… the growth flush is completed. The wood is reasonably firm and leaves have essentially matured,” according to Michael Dirr and Charles W. Heuser, Jr., authors of “The Reference Manual of Woody Plant Propagation.”
This roughly corresponds from July to September, depending on region, species and cultivars. The authors of the aforementioned book claim that the “… common denominator …” for all of the species requiring semi-hardwood for propagation is “… the cessation of growth …” of the mother plant.
What we need to propagate lantana is a basal hardwood cutting. And now, in winter, is the best time to take the cutting.
Select mature, woody stems from last season’s growth. Cut the stems from as close to the crown as possible and try to get at least 7.5 inches, or four to five nodes.
Sticking the lantana cutting
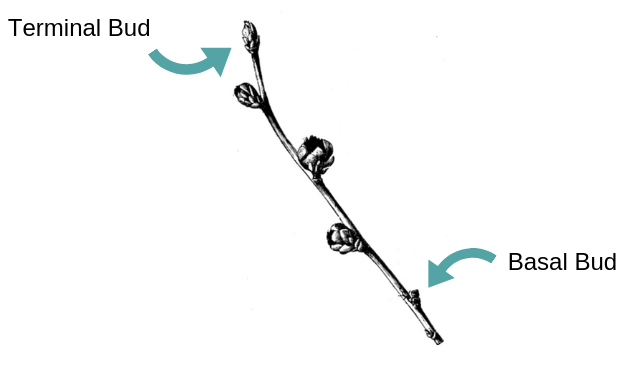
The next step to propagating lantana is to cut the foliage, if any, from the stem. Then, use sharp snips to make a cut at the top of the stem, just above a node (never keep the terminal, aka, apical bud when propagating lantana with this method). Then, cut the bottom of the stem diagonally, just beneath the basal bud (the lowest node on the stem. See the diagram, above).
Learn more about the terminal bud and its importance on a growing stem.
Stick the cutting, diagonally-cut end down, into the sand, ensuring that at least two nodes are buried. Use your hands to pack the sand around the cutting to ensure there’s good contact. Then, water it to settle the sand around the cutting and to remove air pockets.
Do not cover the potted cutting with a plastic bag, as some gardening sites recommend. The top of the cutting must remain cool (above freezing, though) and dry.
Find a spot where the cutting will get lots of natural sunlight and check it daily to ensure that the sand remains moist.
The lantana cutting should root within four to five weeks.


Hi. I am goinflg to be doing lantana cuttings in the next couple of days before the plants are all killed by the cold. I live in Kansas City and they do not make it through the winter.
Your article mentions the hardwood method is used when the plant is dormant. Mine are not, nor will I get that opportunity. Is the hardwood method still the best option in ky situation?
Thank you
I live in Missouri, Zone 6a. Lantana is an annual plant here. If I wait until January to propagate it, won’t it be dead by then?
Thank you for this. At the end, you write, “The top of the cutting must remain cool (above freezing, though) and dry. Find a spot where the cutting will get lots of natural sunlight and check it daily to ensure that the sand remains moist.” Is this column advice for zones 8+? Or can cuttings also be propagated indoors in zones 1-7?
Sorry for the confusion, Rachel. Yes, you can propagate indoors. Just be sure to put it near a window that gets lots of sunlight. Good luck!
The Missouri Botanical Garden recommends taking the cuttings in late summer. Give that a try and do let us know how it works!
Thanks for the question, Tyson. See our response to Jill, above. And thanks for stopping by.