This post may contain affiliate links. As an Amazon Associate we earn from qualifying purchases.
Overwintering pelargoniums isn’t always successful, but what have you got to lose?
Annual ornamental plants: Who had that stupid idea?
Just when we’ve fallen head over heels in love with them, they’re gone. And we are out more money to buy new ones the following season.
Gardening is a cruel taskmaster, I tell ‘ya.
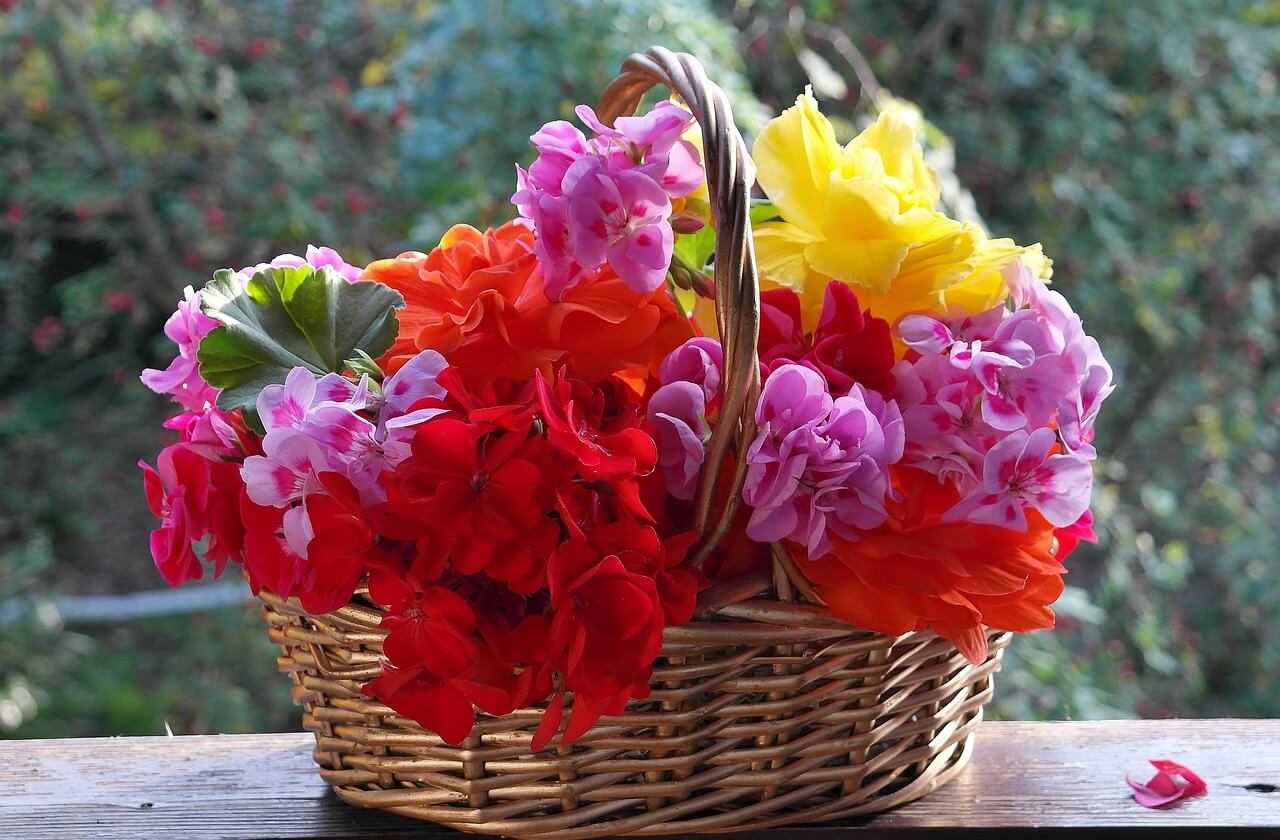
We received an email asking if it is possible to overwinter pelargoniums. And, it is, but, as mentioned above, it isn’t always successful. But what have you got to lose when the plant is going to die anyway? Let’s dive into this.
Pelargonium or Geranium?

I guess we need to first address the elephant in the room: pelargoniums and geraniums are not the same plant. If you have assumed they are, you’re not alone.
Apparently, “The naming problem occurred in the 17th century when the first pelargoniums were brought to Europe and were called geraniums, due to their similarity to the perennial plant,” according to Olivia Heath, House Beautiful UK’s executive digital editor.
It’s a pity too because the geranium is a perennial plant, while the pelargonium is typically grown as an annual (yes, there are exceptions).
There are other differences as well. While both plants are in the same family Geraniaceae), they reside in two distinct genera, Geranium and Pelargonium.
Pelargonium flower petals on the top of the flower are different from the three on the lower part. This, botanists say, give it a “… plane of symmetry,” which makes it zygomorphic. (Maria Morrow, biology professor at College of the Redwoods.)
Geranium flowers, on the other hand, also have five petals but they’re arranged more like the arms of a starfish, radially symmetrical. This is known as actinomorphic.
What’s that you say? Pictures speak louder than words? I agree, so here you go.
So, have we convinced you that the geranium and the pelargonium are two entirely different flowers? They also have different care requirements. Remember, the geranium is a perennial, so caring for it over the winter is a different process from caring for the pelargonium.
Overwintering your pelargonium: Take these steps
I’ve decided to keep this as simple as possible after that last bit of botanical gobbledegook.
Take the time to clean up the pelargonium and the pot it’s growing in because you’ll be bringing it indoors.
Remove all the leaves and other debris from the top of the soil. If it’s been growing in the ground, you’ll need to gently dig it up and pot it up.
Remove dead leaves. Not yellow leaves, not leaves that have a touch of brown here and there, but DEAD leaves. While you’re at it, take off any remaining flowers as well. Cut all the stems as low as you can.
Now we need to find a way to get rid of any bugs that may be on the plant and/or in the soil. Insecticidal soap for the plant will work fine, but since it only kills on contact and it dries quickly, it may take more than one application.
There may be bugs in the soil as well. For that I have to admit I break down and use chemicals. I use Bonide Systemic Insect Control, which is available at Amazon.com.

Set the potted pelargonium in an area indoors next a west- or south-facing window where it will get plenty of sunshine. If you don’t have such a spot, consider placing a grow light near the pelargonium. Again, these are available at Amazon.com.
Keep the temperature as cool as possible; roughly between 50- and 60- degrees Fahrenheit.
Avoid overwatering the pelargonium. Moisture is its worst enemy in the winter. This includes humidity. If you must, place a fan near it to provide it, periodically, with less humid conditions.
Water the soil only when the pot feels light when picked up. Naturally, if the plant seems to wilt or otherwise not look good, increase the water, slightly.
No fertilizer over the winter. Wait until you’ve put it back outside in spring and you see new growth.
 Speaking of spring
Wait until after the last frost date in your area to start the process of moving the pelargonium back outdoors. The outside temperature, ideally, should be in the mid-60s in the daytime and no colder than 48 at night.
Just as you should do with a brand-new-from-the-nursery plant or a seedling, you’ll need to harden off the pelargonium before it takes up its full-time position outdoors, once again.
Before we start that process, however, we like to repot the pelargonium into fresh potting soil.
Then, place the pelargonium in a shady spot for three to five days, moving it gradually to dappled shade for a few days, partial shade, again for three to five days, then in full sun.
Increase the amount of water you give the plant during this period, but don’t overwater.
Watch the pelargonium for new growth. This is your signal to start fertilizing the plant. Dilute the fertilizer to ¼ the strength recommended on the fertilizer label and use the solution to water the plant weekly.
We’d love it if you’d post a photo of your pelargoniums to our Facebook page!
Mention of a fertilizer or pesticide, or use of a pesticide or fertilizer label, is for educational purposes only. Always follow the product’s label directions attached to the container you are using. Be sure that the plant you wish to treat is listed on the label of the pesticide you intend to use. And observe the number of days between pesticide application and when you can harvest your crop.