This post may contain affiliate links. As an Amazon Associate we earn from qualifying purchases.
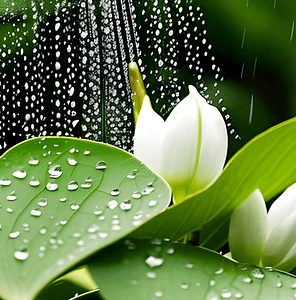
We’re pretty excited to dive into the care of the Lily of the Valley today. This plant adds so much to the landscape, with it’s tiny, nodding flowers and gorgeous foliage. Scientifically knows as Convallaria majalis, this plant is a favorite among garden enthusiasts for its sweet fragrance and graceful appearance.
But before we get carried away with their beauty, it’s essential to highlight a word of caution: Lily of the Valley is toxic, so be sure to handle it with care and wear chemical-resistant gloves when working with its pips (rhizomes) and flowers and keep kids and pets from chewing on any part of the plant.
Now, let’s explore the ins and outs of cultivating this mesmerizing garden treasure.
The Lily of the Valley Basics
- The lily of the valley is a perennial flowering plant native to Europe, with delicate bell-shaped flowers that hang from arching stems.
- These low-growing beauties typically reach a height of 6 to 8 inches (15 to 20 cm), making them ideal for borders, rock gardens, or as ground cover in shady areas.
- Their exquisite appearance and intoxicating scent have made them popular choices for wedding bouquets and May Day celebrations.
- All parts of the plant are toxic to humans and animals. The red berries that form are especially attractive to children.
Where should I plant Lily of the Valley?
Lily of the Valley grows from a “pip,” or rhizome. Check out this post if you have trouble figuring out bulbs from corms from rhizomes. It is confusing to many.
When it comes to planting the Lily of the Valley, timing is crucial. Spring and early fall are the best seasons to plant these enchanting blooms. Choose a location that receives partial to full shade to avoid sun-scorch of those delicate leaves.
Location is also essential as direct sunlight has a tendency to scorch those delicate leaves. The plant can, however, tolerate a few hours of morning sunlight.
Ensure the soil is well-draining, humus-rich, and slightly acidic for optimal growth. Before planting, loosen the soil and remove any weeds or debris.
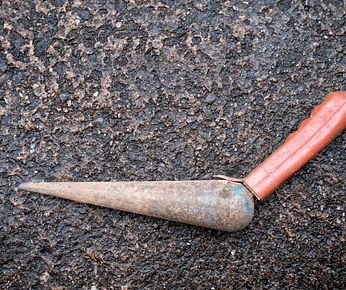
- Create a planting hole deep enough so that the rhizome’s pointed end is 1/2 inch below the soil when covered. If you’ll be planting more than one rhizome (and who doesn’t?!) space the holes 6 inches apart. A garden dibber is the ideal tool for planting rhizomes, etc.
- Spread out the roots.
- Cover the rhizome with soil and water slowly, but deeply.
Water Requirements
When it comes to watering, these lovelies enjoy consistently moist soil. Be mindful not to overwater them, as soggy conditions can lead to root rot.
A general rule of thumb is to water deeply once a week, ensuring the soil remains evenly moist but not waterlogged. Mulching around the plants can help retain moisture and suppress weed growth.

When to Fertilize Lily of the Valley
Lily of the Valley doesn’t really need fertilization unless it’s planted in poor soil. If you feel the need, apply a balanced, slow-release fertilizer to moist soil and water again after the application. Use the rate suggested on the fertilizer bag and apply after the Lily of the Valley has grown several full leaves. This will provide the necessary nutrients to support healthy growth and abundant blooms.
Avoid using fertilizers high in nitrogen, as they can promote excessive foliage growth at the expense of flowers.
A layer of compost or well-rotted organic matter can also be applied around the plants in early spring to enrich the soil and enhance moisture retention.
Common Problems, Diseases, and Pests
While Lily of the Valley is generally a healthy plant, it is susceptible to a few common issues. One of the main problems is overcrowding, which can lead to poor airflow and increased susceptibility to diseases. Regularly thinning out overcrowded clumps will help maintain plant health.
Slugs and snails may also pose a threat to these delicate beauties, so keep an eye out for them and take appropriate measures to control their population. We like Garden Safe Slug and Snail Bait, as it’s safe to use around kids and pets and it’s quite effective.
Additionally, the Lily of the Valley can be susceptible to fungal diseases, such as leaf spot and powdery mildew. Proper air circulation, avoiding overhead watering, and providing well-drained soil can help prevent these issues. We use cultural methods to prevent powdery mildew, but it still creeps in at times. For that we use Arber Bio Fungicide.
Dividing/Propagating Lily of the Valley
Over time, Lily of the Valley can form dense clumps, reducing its vigor and blooming potential. Dividing the plants every two to three years will rejuvenate them, encourage healthier growth and give you a bonus: new plants!
The ideal time to divide Lily of the Valley is in early fall after the plants have finished flowering. Carefully dig around the clumps and then pull them from the soil. Separate the rhizomes, making sure each division has healthy roots and shoots. Replant the divisions at the same depth they were previously growing, ensuring adequate spacing between them to allow for proper airflow and prevent overcrowding.
Lily of the Valley is a mesmerizing addition to any garden, with its delicate blossoms and intoxicating fragrance. However, it’s important to remember that these enchanting plants are toxic, so always exercise caution when handling them.
Remember, gloves on, and enjoy the journey of growing this gorgeous cutie!
Mention of a fertilizer or pesticide, or use of a pesticide or fertilizer label, is for educational purposes only. Always follow the product’s label directions attached to the container you are using. Be sure that the plant you wish to treat is listed on the label of the pesticide you intend to use. And observe the number of days between pesticide application and when you can harvest your crop.


