This post may contain affiliate links. As an Amazon Associate we earn from qualifying purchases.
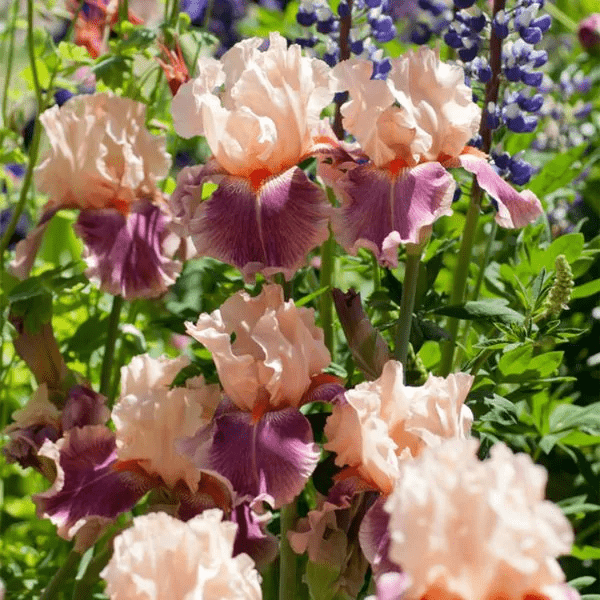
They’re so gorgeous that it seems like iris flower plant care would be intimidating. But it’s not. Read on to learn how.
Just as the rose, the dahlia and the orchid have their fans, with societies, awards and special cultural secrets, so does the iris.
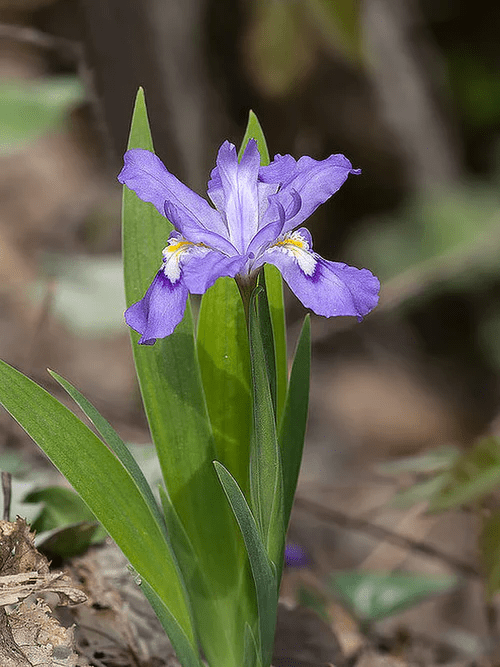
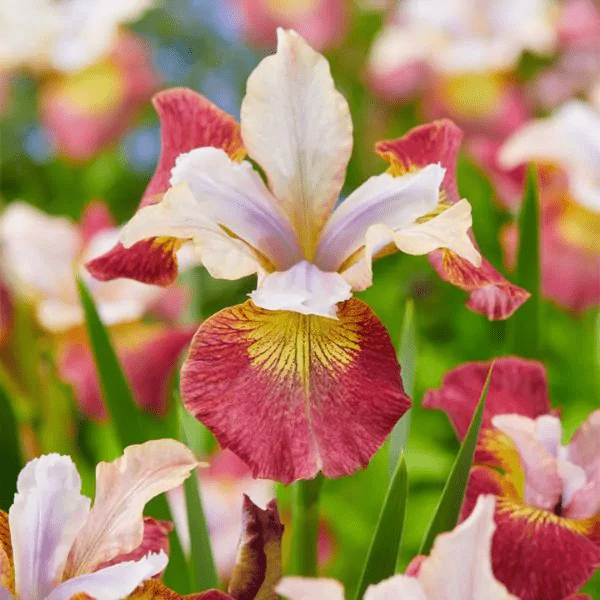
The Iris genus, after all, holds more than 200 species that are classified as either aril, beardless or bearded. The “beard” on the bearded iris is the caterpillar-looking growth on the lower petal.
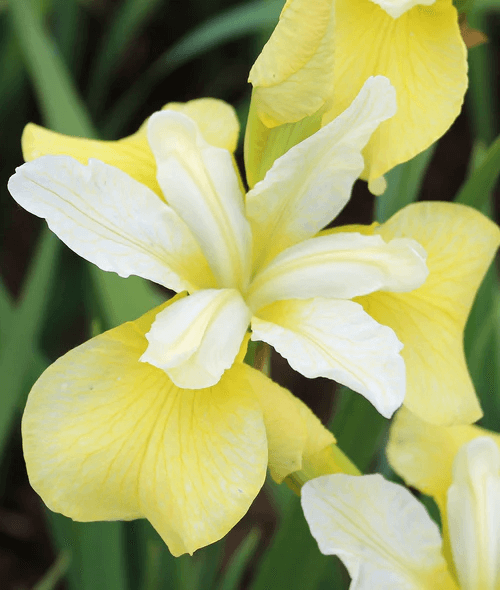
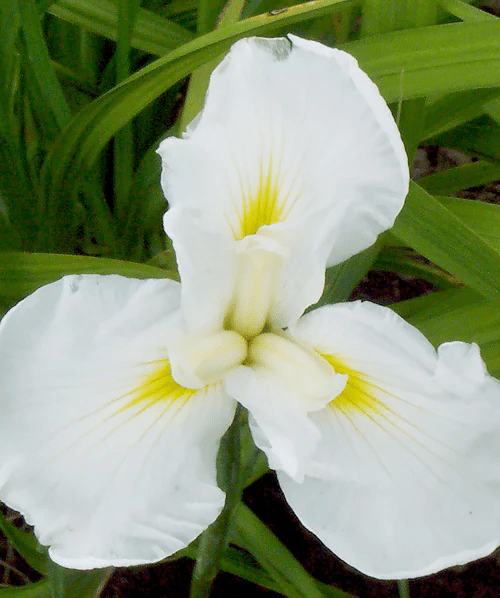
The iris is adored for its large, colorful, showy flowers that bloom, depending upon type, either in spring or summer.
What sort of soil do irises like?
All plant care requires knowledge of the type of preferred soil and that includes iris flower plant care. Irises aren’t fussy when it comes to soil. While the plant does best with a soil pH of 6.8, it tolerates both higher and lower and does fine.
The only requirement that must be met is for well-drained soil. If you have heavy, clay soil, either amend it with lots of organic matter or create raised beds for the irises.
This way you can control not only the soil type and texture, but, because you won’t be walking on the iris bed, you avoid the soil compaction that occurs while working in the garden.
How to plant iris flower plants
One of the most important aspects of iris flower plant care is planting it correctly. Plant the beardless iris, such as the Japanese iris, in the fall and plant bearded irises in mid-summer.
How deep to plant the iris rhizome depends on its size. A rule of thumb is to plant the bearded iris deep enough so that the very top of the rhizome is exposed above the soil and plant Japanese and Siberian irises 2 to 3 inches deep.
Dig the planting hole wide enough so that you can fan out the roots on the bottom of the hole and then pack the soil around the rhizome. Plant irises 12 to 24 inches apart.
How much water do I give my iris?
Water the newly planted iris slowly and deeply after planting and until it becomes established. This is a crucial period when the roots are growing, so don’t allow the soil to dry out. Drip irrigation or a soaker hose placed on the iris bed are ideal solutions for delivering water slowly.
Figure out how long to water by periodically checking the root zone’s moisture. Do this with a length of rebar or bamboo. Stick it into the soil to the depth of the roots. If the probe is wet when you pull it out, you’re finished watering. If you time how long you watered you won’t need to use the probe again. Just set a timer.
Once the bearded iris is established, unless you live in a dry climate, it typically won’t require supplemental water.
Japanese and other beardless iris require consistently moist soil, however, especially in the three weeks leading up to bloom.
What is the best fertilizer for iris?
Purchase a granular 4-10-10 fertilizer. Apply the season’s first fertilizer in spring and make another application one month before bloom.
Dig a 2-inch deep trench, 2 inches to the side of the row of irises and sprinkle the fertilizer granules along the bottom of it. Fill the trench with soil and water slowly and deeply.
This type of fertilizer application is known as side-dressing and it is used to avoid burning the plant’s roots. In late September, sprinkle a handful of bone meal on the soil around each iris plant and water it in.
Iris bugs and other nasties
Like most plants, iris attracts troublemakers. These may appear as fungal, bacterial or viral organisms or they may be pests, ready to munch on your precious irises.
While space doesn’t permit a full overview, read on to learn about the most common bugs and other nasties.
Bugs and insects that love iris

Spider mites
In the photo above, you’ll find the most common evidence of a spider mite infestation: webbing. It typically starts under the leaves and the branch crotches in woody plants, but not always. The white dots you see are the mites; they are that small!
If you’ve ever battled a spider mite infestation you understand how heartbreaking it is to find the symptoms on your iris.
The two-spotted spider mite is the most common perp with irises. While the foliage isn’t the most prized part of the plant, spider mites can make such a mess of it that it detracts from the flower’s beauty.
The leaves will eventually turn yellow, with a mottled appearance.
Be aware that some of the more commonly -recommended sprays for mites should not be used during the iris’ flowering stage.
Use Monterey Horticultural Oil or SuffOil-X® if the plant is still in the vegetative state.
If it is in bloom, consider using PureCrop1 Concentrate. Dilute as per the label instructions.
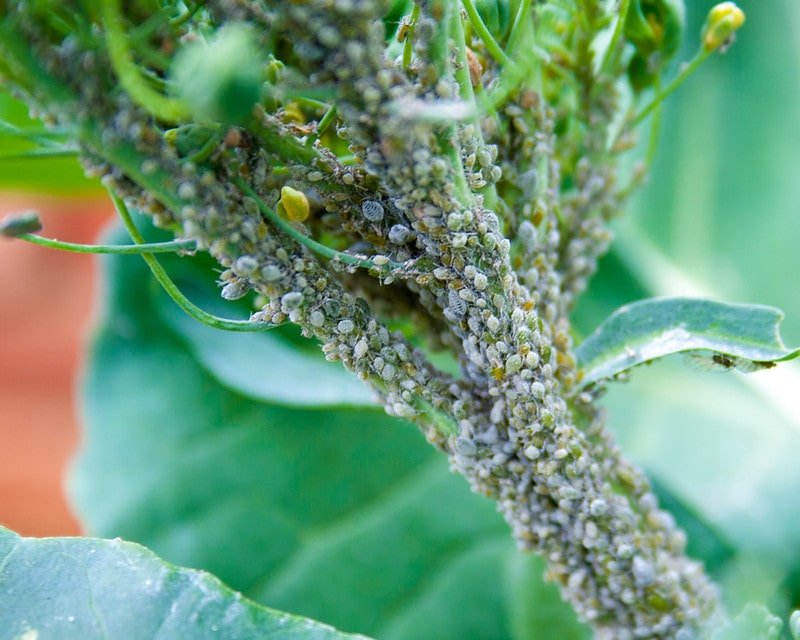
Aphids on your iris?
If you’re seeing a ton of tiny bugs congregated together, it may be aphids. These are easy to control, but it may take several tries. Use a blast of water from the hose to knock them off.
If you’re concerned about what a blast of water might do to the flowers, consider applying an insecticidal soap spray. Please follow the label’s instructions so that you don’t burn your plants.
Onion thrips
One would think that a flowering plant might be the most frequent victim of western flower thrips. But, not the iris.
Onion thrips (Thrips tabaci), the most common pest on onion crops, are also fond of irises. Not only must you worry about the damage caused by the pests’ feeding, but also that they transmit iris yellow spot virus (more on that in the Virus section, below).
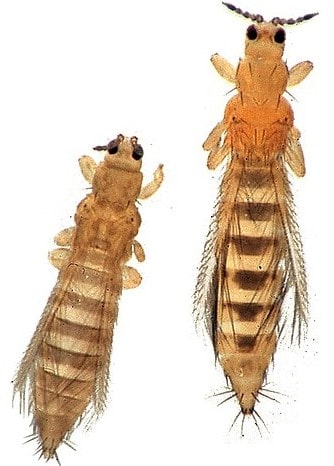
Thrips are very tiny yellow, brown or black insects, but they do leave calling cards: “… dark, fecal pellets and whitened, desiccated plant tissue resulting from mass feedings,” according to the experts at the Missouri Botanical Garden.
The female inserts her eggs into stems and foliage while adults “… puncture flower buds, leaves and stems with their single large mandible then slurp the plant juices that seep from the wound.” They also pierce flowers.
Nasty little critters.
By the way, the photo above is magnified. Thrips are quite small.
We use Monterey Lawn and Garden Bug Buster-O Spray. It’s a bit pricey, but it manages a huge number of pests and diseases so we feel it’s worth the price.
Iris borer

Don’t be deceived by it’s innocuous appearance — iris borer moths are the parents of “… the most destructive insect pests of iris,” according to Jeffrey Hahn, University of Minnesota Extension entomologist and Jody Fetzer.
The adults fly in September and October and the females lay their eggs in the fall as well.
The pinkish larvae munch on the iris’ foliage and bore into its rhizomes. Since the large adults fly only at night, you may find only the damage the larvae left behind and have no idea whose kid caused it.
Hahn and Fetzer suggest that you check the plants, carefully, in spring. Look for:
- Tiny holes left behind as the larvae burrow inside the leaves on their way to the rhizome.
- Tan streaks on leaves (this is also a symptom of some iris diseases, however).
- Leaf tips may turn brown.
Some of these symptoms are hard to find, so take your time checking the plants.
If you suspect that borers are in the leaves, crush the leaves to kill them, or remove the impacted leaves altogether. Check the plant(s) again in July and if you suspect borers, dig up the plant to check its roots. Remove any plants that show rhizome damage.
Manage iris borer with Heterorhabditis bacteriophora, beneficial nematodes. You can purchase them at Amazon.com. Although they are perfectly safe, you will want to follow the instructions carefully for best results.
As a general rule of thumb, apply the nematodes when the iris’ “… leaves are almost fully expanded but before flowering,” according to Hahn and Fetzer.
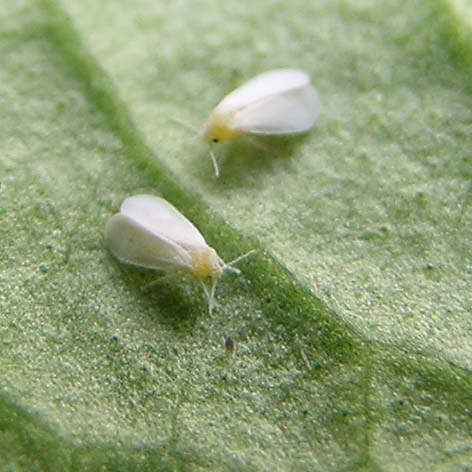
Iris whitefly
Scientifically known as Aleyrodes spiraeoides, the iris whitefly is picky about what it picks on. It is most fond of gardenia and iris. Sure, it will gravitate to certain vegetables, but if you see something that resembles white powdery stuff on the undersides of the iris’ leaves, don’t jump to the conclusion that the plant is hosting mealy bugs. Suspect an iris whitefly infestation.
That “stuff” is actually a waxy substance the young whitefly produces and covers itself in it.
“Heavy infestations may nearly cover the entire surface of the leaf, with heavy production of honeydew and sooty mold,” cautions the experts at pestweb.com.
Look for small white moths with a “… black dot on each wing …” when trying to identify the iris whitefly. In the photo above, you can barely see the black dot. Worse, in real life, without a closeup lens, you may not even notice the whitefly.
Consider placing yellow sticky traps around the plant to ensure that it’s whitefly that is the problem.
Because of their waxy covering, iris whiteflies are a bit of a challenge to control. First, remove the sticky honeydew they secrete on the leaves. This can be accomplished with a soft cloth dipped in diluted rubbing alcohol solution.
If you’ve had problems with the pest in the past, consider purchasing some green lacewing eggs. The larvae will destroy the whitefly’s eggs when released early in the season. They can be purchased on Amazon.com.
If discovered later in the season, use a horticultural oil, according to label instructions, to knock down the infestation. We recommend Bonide All Seasons Horticultural Oil. A reapplication one week after the first, will ensure the problem is under control.
Iris fungal diseases
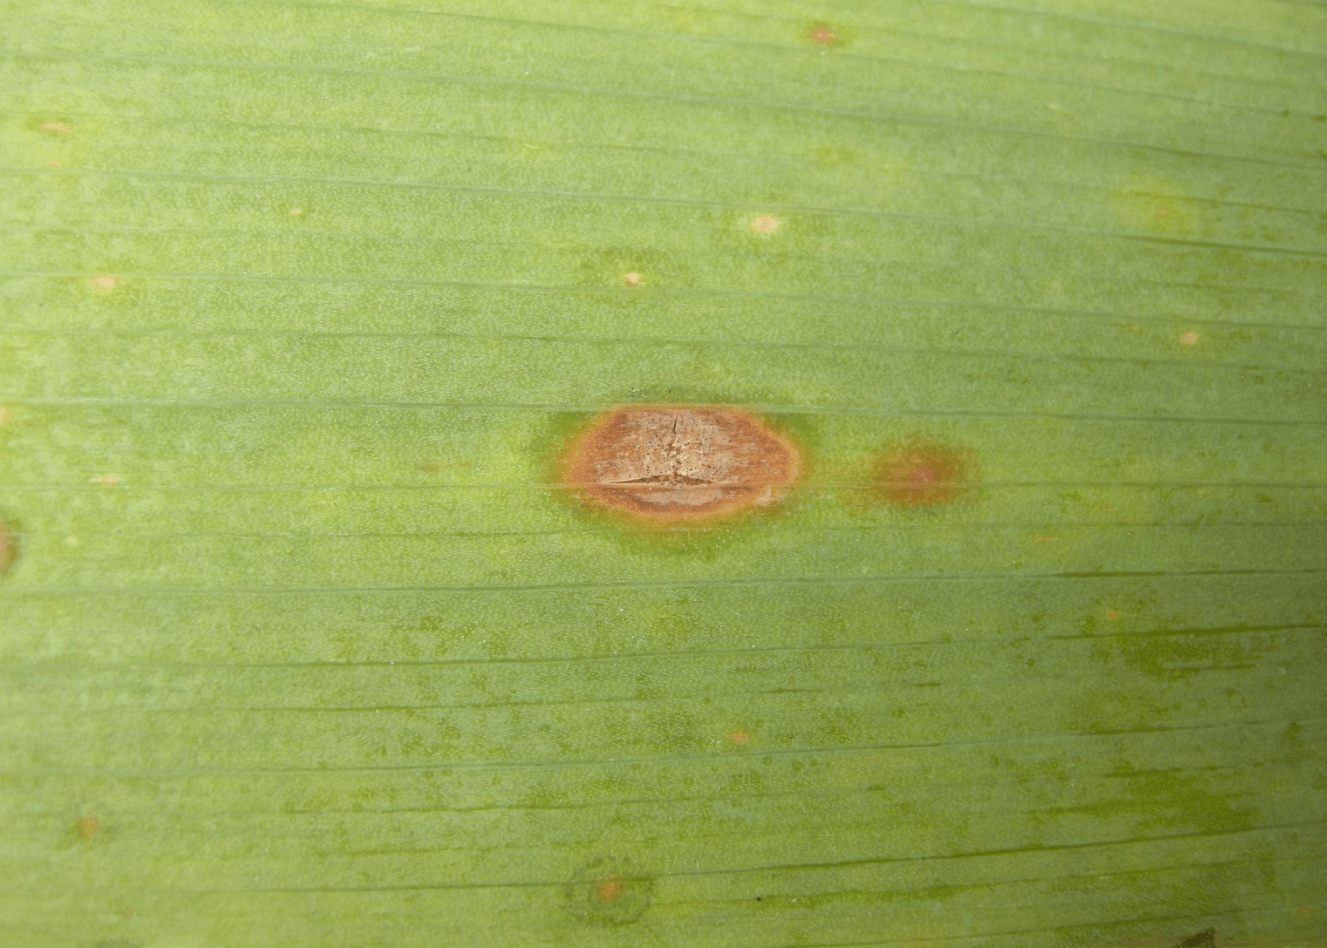
Leaf spot
Iris leaf spot is caused by Cladosporium iridisa, a fungal pathogen that also goes by several synonyms, including Didymellina macrospora.
Although no iris species is immune to the pathogen, it seems rather overly fond of Iris germanica.
Suspect the disease if you notice tiny brown spots on the leaves. These will eventually turn yellow, typically by summer.
When bloom time rolls around, the spots will enlarge at a faster pace and begin producing spores. These end up in the soil where they can be splashed onto the iris by overhead watering or any process that brings the soil into contact with the plant.
This is how creepy fungi spread from plant to plant.
“… a severe infection will impact the growth of the rhizome,” and the “…iris may also no longer have the cold tolerance it once had,” caution the experts at Kansas State University.
The first thing to do when fighting this disease is to be cautious of how you water. Don’t allow soil to splash onto the plant. Keep dead leaves off the soil, especially going into winter as this is their favorite hiding place.
Should the iris come down with a nasty case of leaf spot, consider using a fungicide, such as Bonide Fung-onil Multi-Purpose Fungicide, available at Amazon.com. Read the label carefully and completely and follow the safety precautions.
Iris rhizome rot
If you’re anything like a lot of gardeners, by winter’s end you are probably so excited to have spring color in your garden. You may visit the flower beds multiple time, praying for a peek of green above the soil.
What does it mean then, when your iris never peeps?
Consider iris rhizome rot, caused by the fungus Botrytinia convoluta. If you dig up the plant’s rhizomes you may see a bunch of fuzzy gray stuff and what appears to be a rotted rhizome.
It’s heartbreaking, for sure.
The experts claim that the best way to combat rhizome rot is to prevent it. Remove any infected plants and any parts of infected plants you find in the soil.
Iris bacterial diseases
Bacterial soft rot
If you have iris stems and leaves that become smooshy and then turn slimy and start to stink, suspect soft rot. This is a disease brought on by the bacterium Pectobacterium carotovorum (you may also hear it referred to as Erwinia carotovora).
Although there is nothing we can apply to stop the infection, “… bactericides containing copper can help slow the spread of the pathogen.” [Greenhouse Management Magazine]. Or, try the bio fungicide/bactericide from Arber.
Then, remove all affected plants completely, bag them up and dispose of them. Don’t forget to sterilize your pruners afterward. A dip in a household disinfectant (such as Lysol) should do the trick. Ensure you are using the disinfectant and not the bottle labeled ‘cleaner.” Purchase it at Amazon.com.
Keep the bed free of plant debris and water the iris only at the soil, being careful not to splash soil onto any part of it.
Iris experts recommend that you plant the bulbs shallow, so that the tops of them are exposed to the sun and air. Don’t crowd your plantings.
Bacterial leaf spot
More leaf spot? Yup. This one is a bacterial disease caused by Xanthomonas campestris pv. Tardicrescens. Such fancy names for such creepy organisms, right?
The first sign of this leaf spot will be spots on the foliage (duh). They will be irregular in size and shape and eventually a bunch or all of them will join one another (or “coalesce” as the pros call it) until the surface of the leaf is one big spot.
If this sounds a lot like the earlier-discussed fungal leaf spot caused by Cladosporium iridisa, you will understand why the two are easily confused. Luckily, this one doesn’t impact the bulbs.
Again, the key to preventing this disease is to keep the area as sanitary as possible. Get all the debris off the soil, not only throughout the season, but during fall clean-up as well.
Cut any infected leaves “… well below the water-soaked areas.”[Connecticut Agricultural Experiment Station] And, again, don’t forget to disinfect your pruning shears both before and after you use them on the infected iris.
Mention of a fertilizer or pesticide, or use of a pesticide or fertilizer label, is for educational purposes only. Always follow the product’s label directions attached to the container you are using. Be sure that the plant you wish to treat is listed on the label of the pesticide you intend to use.
Featured image courtesy calliope at flickr.com, CC BY 2.0, via Wikimedia Commons