This post may contain affiliate links. As an Amazon Associate we earn from qualifying purchases.
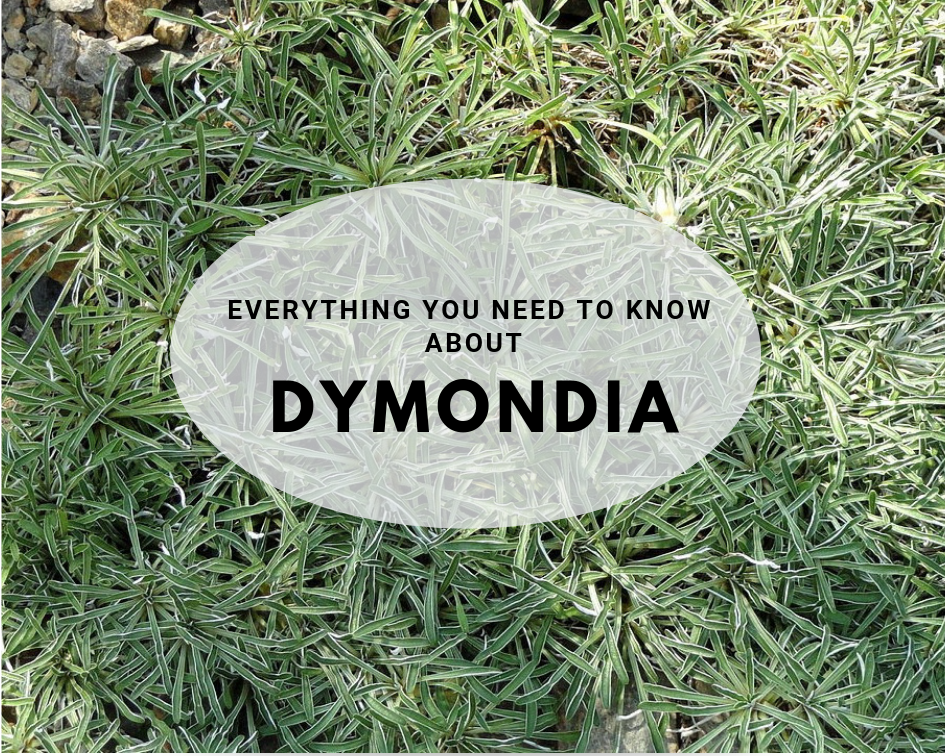
Dymondia margaretae is a compact-growing groundcover, also known as “silver carpet” for the silver cast to its foliage. It grows to a height of 1-inch.
Although many tout Dymondia as a “lawn replacement,” it truly isn’t. Unless, of course, your lawn receives little traffic. Dymondia is a bit picky about traffic.
It’s also a warm-weather plant, doing best in USDA Plant Hardiness Zones 9b through 11. Find your hardiness zone here.
Where the groundcover really shines is on hillsides or as a moss replacement between pavers.
Facts about Dymondia
As mentioned previously, Dymondia does best in areas with light foot traffic. By no means do you need to keep people and pets from walking on it, but a game of rugby on it may cause its demise.
Dymondia is a drought-tolerant groundcover with a deep root system composed of tubers that store nutrients and water. These roots are also what anchor the plant in place when it’s growing on a hillside or slope.
Because it spends so much time developing these roots, it’s a slow-grower aboveground. Once it mats together, though, you’ll have a hardy, weed-fighting groundcover.
How to grow Dymondia
Although Dymondia won’t die if you plant it in the shade, it won’t be at its most attractive and may not grow together to form a mat. Full sun or partial shade is ideal for the plant.
Once it’s established, water only during periods of extended drought. In fact, Dymondia will tell you when it’s thirsty by curling its leaves. It perks right up when it’s watered, though.
Propagate Dymondia
Dymondia is starting to catch on with gardeners but it’s still not widely grown. The ideal way to ensure that you have enough of the plant to cover the area is to immediately propagate the plant when you receive it.
Like most groundcovers, division is the easiest way to create more Dimondia. Remove the plant from the container and use a sharp, sterilized knife to cut through the roots so that each division has its own set.
Plant each in a 1-gallon planting pot so that the roots have room to expand. Standard potting soil is fine.
Water the divisions to keep the soil slightly moist. When they begin spilling over the side of the pot, it’s time to transplant into the garden.
Planting
As with all plants, success with Dymondia requires adequate soil preparation. Till the soil to a depth of at least 10 inches, breaking up any hard areas and large clods. Remember, the roots need lots of room to roam.
After you dig the planting holes, the same depth as the 1-gallon container, fill them with water, allow to drain and fill again.
Plant the plugs 18 inches on center – measure 18 inches from the center of one hole to the center of the next – so about 30 gallons for every 100 square feet.
Keep the Dymondia plants well-watered until they show new growth, then gradually decrease both the amount of water given and the frequency of irrigations.
“Keep the Dymondia plants WELL-WATERED until they show new growth, then gradually decrease both the AMOUNT of water given and the FREQUENCY of irrigations.”
Exactly how often should I be watering newly planted Dymondia? How long should I water newly planted Dymondia at a time?
Hi Collin,
Thanks for the question. It is impossible to tell anyone how often to water and for how long without being familiar with your soil. When you first plant them, keep the soil moist until you see new growth. Then start cutting back gradually until you rarely water the groundcover. It is quite drought tolerant, so don’t overwater once it’s established.